Bonus Blog: Kiddo DIY Ornament Doorhangers

Ornament Doorhanger header

Bonus Blog Day… yeah!… plus a DIY project for the kiddos to boot.

This project is quick easy and great way to use  some of your scrap wrapping paper that isn’t large enough to wrap anything except a gift for a Smurf. It took me all of 10 min to get this project prepped for the kiddos and it kept them entertained for well over an hour. Thus allowing me time to catch up on my blogging, win win for everyone.

DIY Scarp Paper Doorhanger Ornaments

What you’ll need:

  • Cardboard
  • Yarn
  • Glue (I used Modge Podge and paint brushes)
  • Scrap wrapping paper
  • Scissors
  • Box cutter
  • Tape

Prep:

photo 1-4

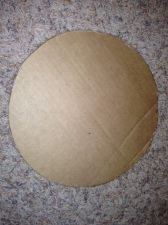
Take cardboard (I used a box) and trace a big circle on it using an upside down bowl. This cardboard box gave me 4 ornaments.

photo 2-3

Use a box cutter and carefully cut out the ornament. Be careful not to lose a digit or slice up your carpet. I put another box underneath it to protect the floor. ManFriend would be none to happy coming home to sliced and diced carpet.

photo 3-3

Cut out the ornament circle. Don’t worry if it has some blemishes or imperfections. The decorations will cover up the yucky parts.

photo 5

Tape yarn in a loop to the back of the ornaments. This will serve as the hanger part of the Ornament Doorhanger.I used green yarn because that’s what I had, but any sort of yarn, twine, ribbon, or string would work great.

photo 4

Take your scraps of wrapping paper and chop’em up. I hacked them into different shapes without really thinking about it. Then I  put them in a basket so the kiddos could reach them easily. I had several scraps and I also cut a few strips from other rolls of wrapping paper. This is a collection of scrap pieces from about 15 rolls of wrapping paper. If you read my post tomorrow, you’ll find out that I have a major wrapping paper problem.

photo-32

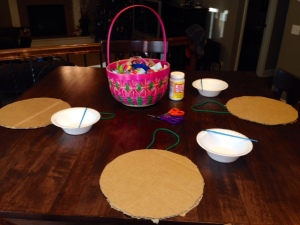
Here is how I set up the crafting corner. I used Modge Podge Glue with little paintbrushes, giving each kiddo their own little “glue bucket”. Since these are older kiddos I gave them scissors so they can cut their own shapes, but you can skip that part if you have younger kiddos at home.

Try this project with your kiddos. They will have a blast and walk away with a beautiful piece of Christmas art to hang on their bedroom door. Let me know how this project works in your home.

As always, until next time,

Keep it Sassy & Classy,

B's Sig

Baby It’s Cold Outside Mint Snowballs

photo-25

Bonus blog time…. yeah!!

Thanks for stopping by on a Saturday, what a perfect day for a fantastically yummy DIY. This tastefully delicate and simple treat will knock the socks off of everyone at your upcoming holiday event. Not a baker, good I’m not either. Tend to set the house on fire when you even think about using the kitchen, awesome me to. This DIY recipe takes 3 ingredients and a refrigerator. It’s so easy even I can do it. With that said, let’s do this.

Who’s ready for a snowball fight?!?!

Baby It’s Cold Outside Mint Snowballs

What You’ll Need

photo-30

  • 6 cups powdered sugar
  • 1 tsp. peppermint extract (use your measuring spoons, I promise too much peppermint is never a good thing)
  • 8 oz. cream cheese (softened to room temperature)
  • Cookie sheet
  • Parchment paper

Lets Make Some Snowballs

Put your softened cream cheese in a mixing bowl and with a mixer (I used a handheld mixer) mix until smooth and creamy. Since the cream cheese is already at room temperature it shouldn’t take too long. Now add the 1 teaspoon of peppermint, take my advice, use your measuring spoon. This isn’t one you want to eye because a little bit extra peppermint will take you from food awesomeness in your mouth, to gagging and hacking uncontrollably. Then half a cup at a time add your powdered sugar, you’ll want to keep using your mixer. After about 4 cups the snowball mixture should be firm enough you can kneed the remaining 2 cups of powdered sugar by hand.

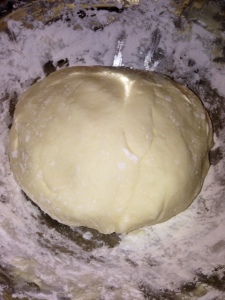
You snowball mixture will start out looking like this…

photo 1-3


And end up looking like this…

photo-26


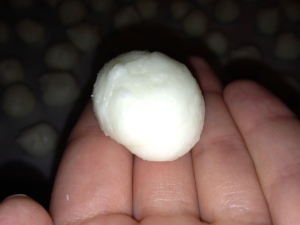
Then you will roll it into tiny little snowballs such as this….

photo 3-2


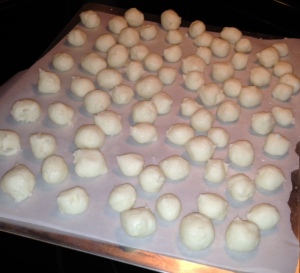
And put your snowballs on a cookie sheet lined with parchment paper like so…

photo-27

Oh and wear an apron (Dear Santa, please bring this girl an apron, I’ve been pretty good…. not terrible… I haven’t kicked anyone this year… yet) or you will end up looking like this.

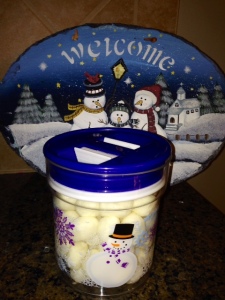
I packaged my But Baby It’s Cold Outside Mint Ball in a snowman canister. They will be joining me and Manfriend on a White Elephant Gift Party adventure tonight.

photo-29

And there you have it, Baby It’s Cold Outside Mint Snowballs. From beginning to end this DIY deliciously minty treat took about half an hour. Sure beats spending hours in the kitchen or risking a visit from the fire department… unless the firefighters are hot… oops, I digress.

Note: You will want to keep your snowballs in the fridge in a sealed container (without a zip lock bag or another type of sealed container they will dry out and be less than snowbally). The snowballs will keep for up to 2 weeks in the fridge or 2 months in the freezer.

As always, until next time lovelies,

Keep it Sassy & Classy,
B's Sig

12 Days of Christmas Blogging: DIY Orange Dream Sugar Scrub

Day three of 12 Days of Christmas Blogging brings us to, DIY Christmas Gifts. I love this one. Raise your hand if you like soft skin. Raise your hand if you like soft skin that smells amazing. Raise your hand if you like to have soft skin that smells good AND you don’t have to pay an arm and a leg for it. I thought so me too.

Forget pricey scrubs, this  DIY sugar scrub is so good you can even eat it. That’s right, this scrub is 100% edible so you aren’t smearing any yucky chemicals on your skin. Do I have your interest? Good keep reading…

I may not be the craftiest person in the world, but I still love the feeling of giving a DIY gift. I know that venturing into stores this time of year is fantastic fun, what with Christmas music and the holiday season people watching, but there is a personal element that is missing. DIY gifts always add a touch of, “Hey you, yah you, you’re worth it.(Winky Face)” (I’m sure that sounds silly, but DIY gifts get me all warm and fuzzy. Here is one of my favorite DIY projects, this is super easy, if I can do it so can you. I promise.

Orange Dream Sugar Scrub

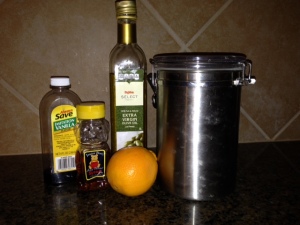
Ingredients:

Zest from 1 orange (two oranges if you want it extra orangy)

1 tsp. vanilla extract, (two tsp. if you want it extra dreamy)

1/4 cup EVOO (Extra virgin olive oil)

1 cup Sugar

photo 3-1

(This can easily be double or tripled for larger batches, I did a single batch for this DIY how to)

Combine all of your ingredients into a mixing bowl and stir until fully combined.

photo 1-2

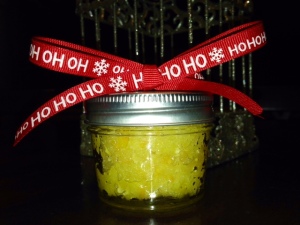
Once all of your ingredients are combined, put your delicious smelling mix into mason jars or other storage containers. This single batch made three of these containers for me. Add a beautiful bow or wrapping for a little extra pizzazz. You can’t go wrong with ribbon.

photo 2-2

I have made this for a few years now and it’s always a big hit. I’ve used it for both stocking stuffers and bigger gift combined with a  loofa. Spa products are awesome and the Orange Dream Sugar Scrub, won’t disappoint. The entire process took me less than 5 min, so you can make several in no time at all. Perfect for stockings or treats for the ladies in the office. My man friend won’t admit it, but he uses it sometimes as well, but that will have to be our little secret.

Try it out and let me know what you think. Do you have a favorite sugar scrub recipe? Thank you so much for sharing in Day 3 with me, I’m loving this Christmas adventure. Tomorrow we talk, Christmas music. If you are are 90’s kid like me you won’t want to miss this.

Until next time lovelies…

Keep is Sassy & Classy,

B